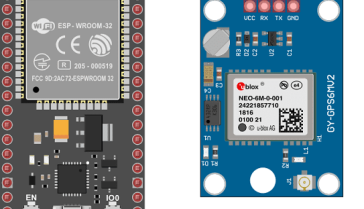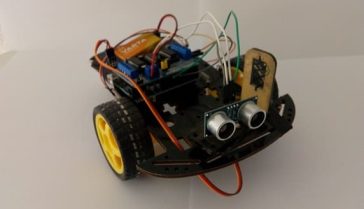

A robot car is a type of robotic vehicle that is designed to move on wheels. It can be controlled by a microcontroller or computer and can be programmed to move in specific patterns or respond to certain inputs. Robot cars can be used for a variety of purposes, such as transportation, research, and entertainment. They can be powered by batteries or plug into an electrical outlet, and can be small enough to fit on a tabletop or large enough to carry a person. Some robot cars are also equipped with sensors and cameras to help them navigate and interact with their environment.
A robot car can be powered by an ESP32 microcontroller and can be controlled over Wi-Fi. ESP32 is a microcontroller with built-in WiFi and Bluetooth capabilities, making it an ideal choice for wireless communication and control of the robot car.
The ESP32 can be programmed to control the movement of the robot car, receive commands from a remote device, and send sensor data over the Wi-Fi connection. The ESP32 can also be used to add additional functionality to the robot car, such as object avoidance, automatic navigation, and remote control through a smartphone or computer.
The robot car can be controlled via a web interface or mobile application, and can be connected to a network to enable communication with other devices, such as a computer or smartphone.
It’s a popular choice for hobbyist and educational projects because of the low cost, small size and powerful features of the ESP32 chip.
Objective of this project:
In this project we are going to make a car equipped with a remote ESP32 card (by Wifi).
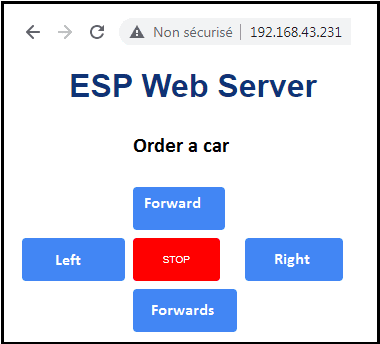
The user controls the car through a simple web browser that displays the direction buttons (forward, right, left, back and left).
Components required
ESP32 card
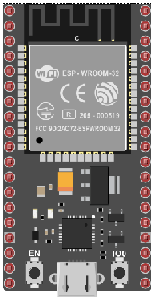
ESP32 is a series of low-cost, low-power system on a chip microcontrollers with integrated Wi-Fi and dual-mode Bluetooth. It was developed by Espressif Systems, a Shanghai-based Chinese company. The ESP32 chip is a powerful microcontroller that has a dual-core processor with a clock speed of up to 240 MHz, and it has a wide range of peripheral interfaces, such as I2C, SPI, UART, and ADC. It also has built-in support for Bluetooth and Wi-Fi, which makes it suitable for a wide range of IoT (Internet of Things) applications.
L298N module
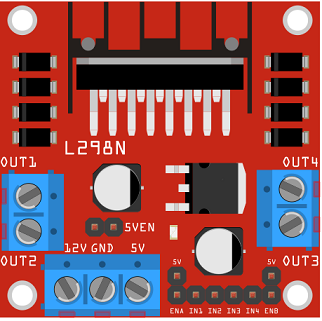
The L298N module is a motor driver module that can be used to control the speed and direction of two DC motors. It is commonly used in robotic car projects because it can handle the high current requirements of motors and has built-in protection against overheating and overcurrent. The module can be controlled using a microcontroller, such as a ESP32 card, to send PWM signals to control the speed of the motors and digital signals to control the direction of rotation.
5V/3.3V Supply power module
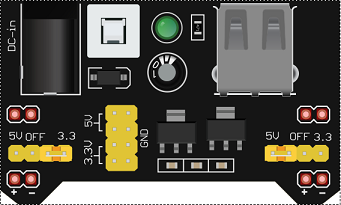
A 5V/3.3V power supply module is a device that can provide regulated power to electronic circuits at both 5V and 3.3V voltage levels. The module typically includes voltage regulators that convert a higher input voltage (such as 7-12V) to a stable and precise output voltage. This type of module is useful in projects where different components require different voltage levels and it eliminates the need for multiple power supply units. The module can be powered using a DC adapter or battery.
2 wheel car robot kit
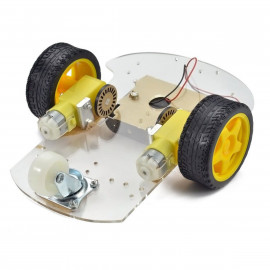
A 2-wheel car robot kit is a collection of components that can be used to build a small, autonomous robot that moves on two wheels. These kits typically include a microcontroller, such as a ESP32 card, to control the robot’s movements, as well as motors, wheels, and other hardware to enable the robot to move and navigate.
2-wheel car robots are often used as educational tools, as they can be used to teach basic principles of robotics, electronics, and programming. They can also be used as a platform for experimenting with different control algorithms, sensors, and other hardware.
This robot kit is composed of:
-
car chassis.
-
2 gear motors (1:48)
-
2 car tires
-
1 universal wheel
connecting wires

Wires are used to transmit electrical signals and power to various components such as motors, sensors, and microcontrollers. It’s important to properly route and secure the wires to prevent tangles and damage. There are several methods for doing this, including using cable ties, clamps, and wire looms. It’s also a good idea to use different colors or labeling to identify the different wires and their functions. When connecting wires in a robot, it’s important to follow proper safety procedures, such as using the correct wire stripper and connectors, and wearing protective equipment such as gloves and safety glasses.
9V battery
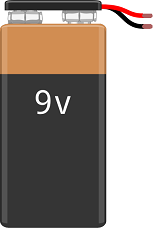
A 9V battery is a type of primary cell, meaning it is not rechargeable and must be replaced after use. It is typically used as a power source for small electronic devices, such as portable radios, smoke detectors, and some types of toys. The « 9V » refers to the nominal voltage of the battery, which is the average voltage it produces when it is fully charged. The actual voltage of a 9V battery can vary depending on the type and state of charge, but it will typically be around 6V-9.5V. Common types of 9V batteries are carbon-zinc, alkaline, and lithium.
Car assembly
-
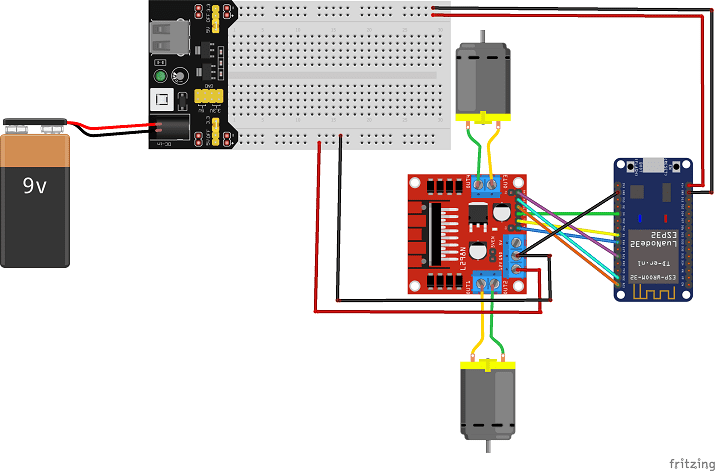
Connect pin N °5 of the ESP32 board to pin IN1 of the L298N module.
-
Connect pin N ° 4 of the ESP32 board to pin IN2 of the L298N module.
-
Connect pin No. 23 of the ESP32 board to pin IN3 of the L298N module.
-
Connect pin N ° 22 of the ESP32 board to pin IN4 of the L298N module.
-
Connect the GND pin of the ESP32 board to the GND pin of the L298N module.
-
Connect the VIN pin of the ESP32 board to the (+) terminal of the power supply module
-
Connect the GND pin of the ESP32 board to the (-) terminal of the power supply module
-
Connect the 12V pin of the L298N module to the (+) terminal of the power supply module
Web page that controls the car
To control the car by wifi, open a web browser and enter the IP address of the Esp32 card to obtain a command interface as in the image below.
MicroPython program
boot.py
Copy the following code to the ESP32 boot.py file.
|
1 2 3 4 5 6 7 8 9 10 11 12 13 14 15 16 17 18 19 20 21 22 23 24 25 26 27 28 29 30 31 32 33 34 35 36 37 38 39 40 41 42 43 44 45 46 |
# Complete project details at https://RandomNerdTutorials.com from dcmotor import DCMotor from machine import Pin, PWM from time import sleep try: import usocket as socket except: import socket from machine import Pin import network import esp esp.osdebug(None) import gc gc.collect() ssid = '***********' # WIFI login password = '***********' # WIFI password station = network.WLAN(network.STA_IF) station.active(True) station.connect(ssid, password) while station.isconnected() == False: pass print('Connection successful') print(station.ifconfig()) #led = Pin(2, Pin.OUT) frequency = 15000 pin1 = Pin(5, Pin.OUT) pin2 = Pin(4, Pin.OUT) pin3 = Pin(23, Pin.OUT) pin4 = Pin(22, Pin.OUT) enable = PWM(Pin(18), frequency) enable1 = PWM(Pin(21), frequency) dc_motor = DCMotor(pin1, pin2, enable) dc_motor = DCMotor(pin1, pin2, enable, 350, 1023) dc_motor1 = DCMotor(pin3, pin4, enable1) dc_motor1 = DCMotor(pin3, pin4, enable1, 350, 1023) |
main.py
Copy the following code to the ESP32 main.py file.
|
1 2 3 4 5 6 7 8 9 10 11 12 13 14 15 16 17 18 19 20 21 22 23 24 25 26 27 28 29 30 31 32 33 34 35 36 37 38 39 40 41 42 43 44 45 46 47 48 49 50 51 52 53 54 55 56 57 |
# Complete project details at https://RandomNerdTutorials.com def web_page(): html = """<html><head> <title>ESP Web Server</title> <meta name="viewport" content="width=device-width, initial-scale=1"> <link rel="icon" href="data:,"> <style>html{font-family: Helvetica; display:inline-block; margin: 0px auto; text-align: center;} h1{color: #0F3376; padding: 2vh;}p{font-size: 1.5rem;}.button{display: inline-block; background-color: #e7bd3b; border: none; border-radius: 4px; color: white; padding: 16px 30px; text-decoration: none; font-size: 10px; margin: 2px; cursor: pointer;} .button2{background-color: #4286f4;}.button3{background-color: red;}</style></head><body> <h1>ESP Web Server</h1> <strong>Order a car </strong></p> <table> <tr><td></td><td><p><a href="/?direction=forward"><button class="button button2">Forward</button></a></p></td><td></td></tr> <tr><td><p><a href="/?direction=left"><button class="button button2">Left</button></a></p></td><td><p><a href="/?direction=off"><button class="button button3">STOP</button></a></p></td> <td><p><a href="/?direction=right"><button class="button button2">DROITE</button></a></p></td></tr> <tr><td></td><td><p><a href="/?direction=backwards"><button class="button button2">Backwards</button></a></p></td><td></td></tr> </body></html> </table> """ return html s = socket.socket(socket.AF_INET, socket.SOCK_STREAM) s.bind(('', 80)) s.listen(5) while True: conn, addr = s.accept() print('Got a connection from %s' % str(addr)) request = conn.recv(1024) request = str(request) print('Content = %s' % request) direction_forward = request.find('/?direction=forward') direction_stop = request.find('/?direction=off') direction_right = request.find('/?direction=right') direction_left = request.find('/?direction=left') direction_backwards = request.find('/?direction=backwards') if direction_forward == 6: # we click on the forward button dc_motor.forward(80) # the car is moving dc_motor1.forward(80) if direction_stop == 6: # we click on the stop button dc_motor.stop() # the car stops dc_motor1.stop() if direction_right == 6: # we click on the right button dc_motor.forward(10) # the car turns right dc_motor1.forward(80) if direction_left == 6: # we click on the left button dc_motor.forward(80) # the car turns left dc_motor1.forward(10) if direction_backwards == 6: #we click on the backwards button dc_motor.backwards(80) # the car reverses dc_motor1.backwards(80) response = web_page() conn.send('HTTP/1.1 200 OK\n') conn.send('Content-Type: text/html\n') conn.send('Connection: close\n\n') conn.sendall(response) conn.close() |
dcmotor.py
Copy the following code into an ESP32 file named dcmotor.py.
|
1 2 3 4 5 6 7 8 9 10 11 12 13 14 15 16 17 18 19 20 21 22 23 24 25 26 27 28 29 30 31 |
class DCMotor: def __init__(self, pin1, pin2, enable_pin, min_duty=750, max_duty=1023): self.pin1=pin1 self.pin2=pin2 self.enable_pin=enable_pin self.min_duty = min_duty self.max_duty = max_duty def forward(self,speed): self.speed = speed self.enable_pin.duty(self.duty_cycle(self.speed)) self.pin1.value(1) self.pin2.value(0) def backwards(self, speed): self.speed = speed self.enable_pin.duty(self.duty_cycle(self.speed)) self.pin1.value(0) self.pin2.value(1) def stop(self): self.enable_pin.duty(0) self.pin1.value(0) self.pin2.value(0) def duty_cycle(self, speed): if self.speed <= 0 or self.speed > 100: duty_cycle = 0 else: duty_cycle = int(self.min_duty + (self.max_duty - self.min_duty)*((self.speed-1)/(100-1))) return duty_cycle |

