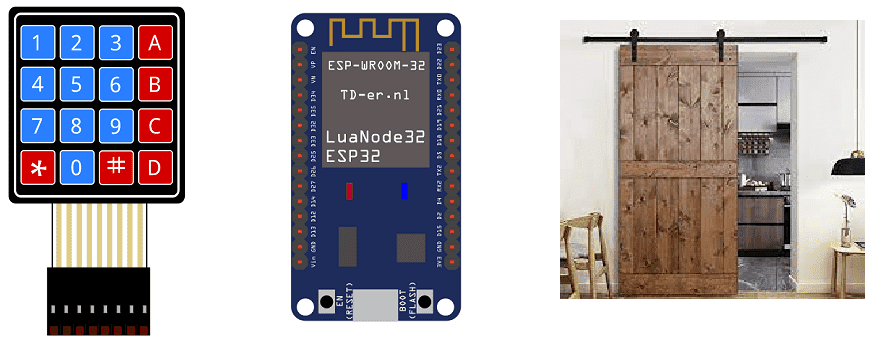
Door security system controlled by ESP32

A door security system is a device or system that is used to secure a door and prevent unauthorized access. There are several different types of door security systems, including keyless entry systems, keypad entry systems, and biometric systems.
Here are some examples of how a door security system might be used:
- Securing a home or office: A door security system can be used to secure the doors of a home or office and prevent unauthorized access.
- Controlling access to a building or facility: A door security system can be used to control access to a building or facility by allowing only authorized personnel to enter.
- Monitoring access to a restricted area: A door security system can be used to monitor access to a restricted area and record when people enter or leave.
- Sending alerts: A door security system can be configured to send alerts if the door is opened unexpectedly or if an unauthorized person attempts to enter.
By using a door security system, you can secure your doors and control access to your home, office, or other building. You can also monitor access to restricted areas and receive alerts if there is unusual activity.
The ESP32 is a microcontroller that can be used to control and monitor various devices and systems, including a door security system. By using the ESP32, you can create a door security system that can detect when a door is opened or closed and take appropriate actions based on the status of the door.
Purpose of this project:
In this project, we will build a password-based door lock system by interfacing the ESP32 board with a 4×4 keypad to enter the password.
We use a sliding door opening or closing by horizontal translation thanks to a 5V DC motor.
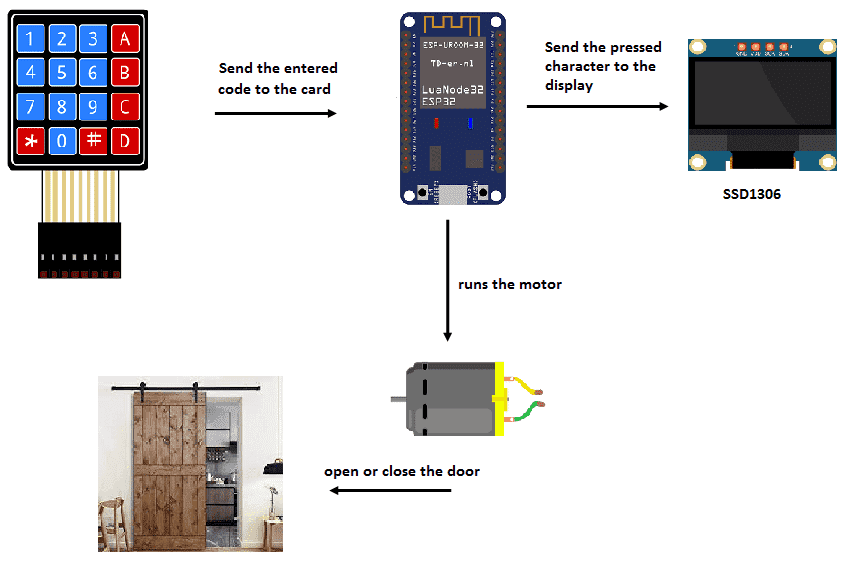
With this project, we can build a security system that works with a password. We must enter a code to close or open the door.
Description of how the door security system works
Necessary components:
ESP32 card
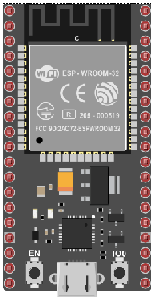
An ESP32 card is a physical device that includes an ESP32 microcontroller and associated components, such as memory and input/output (I/O) pins. These cards are typically designed to be easily integrated into a project or prototype, and can be plugged into a breadboard or other prototyping platform.
ESP32 cards are often used in Internet of Things (IoT) projects, as the ESP32 microcontroller has built-in WiFi and Bluetooth capabilities, making it well suited for connecting to the internet and communicating with other devices wirelessly. These cards may also include additional features such as sensors, OLED displays, or other components that can be used in a project.
4×4 keypad
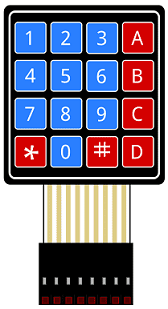
A 4×4 keypad is a device that consists of a grid of 4 rows and 4 columns of buttons, for a total of 16 buttons. It is commonly used as an input device for electronic projects and can be used to enter numbers, characters, or commands.
To use a 4×4 keypad, you will need to connect it to your project using wires. Each button on the keypad is connected to a row and a column on the keypad matrix. To determine which button has been pressed, you can scan the rows and columns of the matrix and look for a low voltage.
Display SSD1306
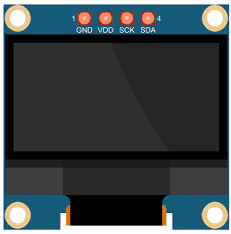
The SSD1306 is a monochrome OLED (organic light-emitting diode) display controller, which is used to control small OLED displays. These displays are often used in small, portable electronic devices, such as smartphones, smartwatches, and other wearables. They are known for their high contrast, wide viewing angles, and low power consumption, making them a popular choice for display applications.
The SSD1306 controller is used to communicate with the OLED display and to control the display’s contents. It is a small, low-power device that is typically driven by an external microcontroller, such as ESP32. The controller receives data from the microcontroller and sends it to the OLED display, which then displays the data as an image or text.
L298N motor board
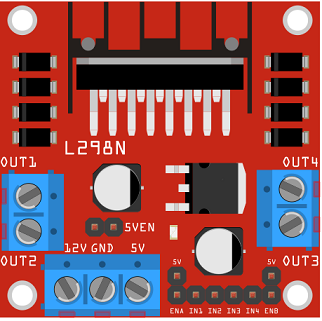
The L298N is a dual H-bridge motor driver IC that is commonly used to control the speed and direction of small DC motors, as well as to drive stepper motors. It can also be used to control the speed and direction of larger motors, such as those found in electric vehicles, by using external power MOSFETs.
The L298N has a number of input and output pins that can be used to control the motors and monitor their status. It can be driven by a microcontroller, such as an Arduino, or by other digital logic devices. The L298N can be used to drive motors in both forward and reverse directions, and the speed of the motors can be controlled by adjusting the duty cycle of the control signals.
5V DC motor
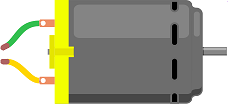
A 5V DC motor is a type of electric motor that operates on direct current (DC) voltage. It is a small motor that typically runs on 5V of power, although the voltage may vary slightly depending on the specific motor and the load it is driving. These motors are often used in small electronic devices, such as portable fans, toys, and robotic applications. They are generally very reliable, efficient, and simple to control, making them a popular choice for many different types of projects and applications.
test plate
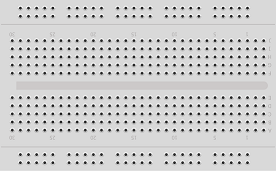
A test plate is a type of device used in robotics to test the functionality and performance of various components or systems. It is typically a physical platform or structure that is designed to hold and support various test items or devices, such as sensors, actuators, motors, or other types of mechanical or electrical components. Test plates can be used to simulate different environments or conditions, such as temperature, humidity, vibration, or other factors, in order to evaluate the performance of the components or systems being tested. They can also be used to perform a variety of diagnostic or diagnostic tests, such as stress testing, endurance testing, or other types of evaluations.
connecting wires

Wires are used to transmit electrical signals and power to various components such as motors, sensors, and microcontrollers. It’s important to properly route and secure the wires to prevent tangles and damage. There are several methods for doing this, including using cable ties, clamps, and wire looms. It’s also a good idea to use different colors or labeling to identify the different wires and their functions. When connecting wires in a robot, it’s important to follow proper safety procedures, such as using the correct wire stripper and connectors, and wearing protective equipment such as gloves and safety glasses.
Assembly of the ESP32 board with the SSD1306 display and the 4×4 keyboard:
We connect the 8 outputs of the keyboard to the 8 pins of the ESP32 card following this order: D2, D4, D5, D18, D19, D16, D15 and D23.
For the SSD1306 display we connect:
-
the SDA pin to the D21 pin of the ESP32 board
-
the SCL pin to the D22 pin of the ESP32 board
-
the GND pin to the GND pin of the ESP32 board
-
the VCC pin to the 5V pin of the ESP32 board

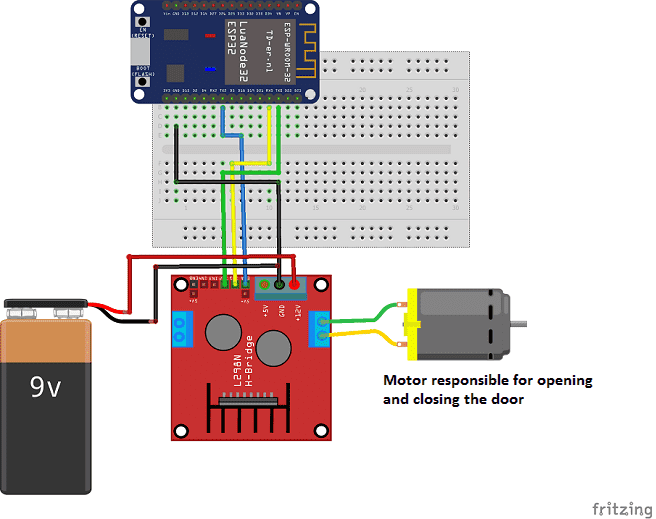
Assembly of the ESP32 board with the L298N board and the motor:
-
Connect pin 17 of the ESP32 board to the ENA pin of the L298N module.
-
Connect pin 3 of the ESP32 board to pin IN1 of the L298N module.
-
Connect pin 1 of the ESP32 board to pin IN2 of the L298N module.
-
Connect the GND pin of the ESP32 board to the GND pin of the L298N module.
-
Connect the GND pin of the ESP32 board to the (-) terminal of the 9V battery
-
Connect the 12V pin of the L298N module to the (+) terminal of the 9V battery
-
Connect the two motor terminals to the two pins OUT1 and OUT2 of the L298N module
Micropython Program
Here is the micropython program which allows to open or close the door by the ESP32 card.
Note: the following two libraries must be imported: ssd1306 and dcmotor
esp32-door.py:
|
1 2 3 4 5 6 7 8 9 10 11 12 13 14 15 16 17 18 19 20 21 22 23 24 25 26 27 28 29 30 31 32 33 34 35 36 37 38 39 40 41 42 43 44 45 46 47 48 49 50 51 52 53 54 55 56 57 58 59 60 61 62 63 64 65 66 67 68 69 70 71 72 73 74 75 76 77 78 79 80 81 82 83 84 85 86 87 88 89 90 |
from machine import UART from dcmotor import DCMotor from machine import Pin, PWM,I2C from time import sleep import ssd1306 import time import utime i2c = I2C(scl=Pin(22), sda=Pin(21)) #Init i2c oled=ssd1306.SSD1306_I2C(128,64,i2c,0x3c) oled.fill(0) oled.text('Code',10,10) oled.show() frequency = 15000 pin1 = Pin(3, Pin.OUT) pin2 = Pin(1, Pin.OUT) enable = PWM(Pin(17), frequency) dc_motor = DCMotor(pin1, pin2, enable) dc_motor = DCMotor(pin1, pin2, enable, 350, 1023) KEY_UP = const(0) KEY_DOWN = const(1) keys = [['1', '2', '3', 'A'], ['4', '5', '6', 'B'], ['7', '8', '9', 'C'], ['*', '0', '#', 'D']] # Pin names for keypad cols = [19,16,15,23] rows = [2,4,5,18] # set pins for rows as outputs row_pins = [Pin(pin_name, mode=Pin.OUT) for pin_name in rows] # set pins for cols as inputs col_pins = [Pin(pin_name, mode=Pin.IN, pull=Pin.PULL_DOWN) for pin_name in cols] def init(): for row in range(0,4): for col in range(0,4): row_pins[row].value(0) def scan(row, col): """ scan the keypad """ # set the current column to high row_pins[row].value(1) key = None # check for keypressed events if col_pins[col].value() == KEY_DOWN: key = KEY_DOWN if col_pins[col].value() == KEY_UP: key = KEY_UP row_pins[row].value(0) # return the key state return key print("starting") # set all the columns to low init() code="" while True: oled.fill(0) if (len(code)<4): for row in range(4): for col in range(4): key = scan(row, col) if key == KEY_DOWN: oled.text("code: ",10,0) print("Key Pressed", keys[row][col]) code=code+keys[row][col] oled.text(code, 55, 30) oled.show() last_key_press = keys[row][col] time.sleep_ms(500) if (code=="2886"): time.sleep(1) dc_motor.forward(80) # the motor turns to open the door time.sleep(1) dc_motor.stop() # stop le moteur code="" if (code=="0000"): time.sleep(1) dc_motor.backwards(80) # the motor rotates in the opposite direction to close the door time.sleep(1) dc_motor.stop() # stop le moteur code="" |



Ashly 04-07-2222
Having read this I thought it was extremely enlightening. I appreciate you finding the time and energy to put this content together. I once again find myself spending a significant amount of time both reading and posting comments. But so what, it was still worth it!
Ricardo 09-06-2222
It's in reality a nice and useful piece of info. I am happy that you shared this helpful information with us.