Control US-17HS4401 stepper motor by Arduino and L293D

Purpose of this tutorial
To control the US-17HS4401 stepper motor using an Arduino and L293D module shield, you can follow these steps:
- Connect the stepper motor to the L293D module shield. The motor has four wires, which should be connected to the module shield’s A+, A-, B+, and B- terminals, respectively.
- Connect the L293D module shield to the Arduino board. The module shield has a set of control pins that should be connected to the Arduino’s digital output pins. The ENA and ENB pins should be connected to digital pins 3 and 9, respectively. The IN1, IN2, IN3, and IN4 pins should be connected to digital pins 4, 5, 6, and 7, respectively.
- Connect a power supply to the L293D module shield. The module shield requires a power supply with a voltage range of 4.5V to 36V. Connect the power supply’s positive and negative terminals to the module shield’s VM and GND terminals, respectively.
- Write a program to control the stepper motor using the Arduino board. You can use a stepper motor control library, such as the Stepper library that comes with the Arduino IDE, to simplify the programming.
The necessary components
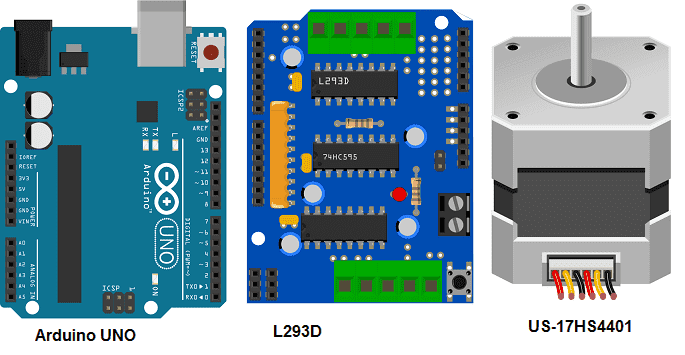
Arduino UNO

Arduino Uno is an open-source microcontroller board based on the ATmega328P microcontroller chip. It is one of the most popular and widely used boards in the Arduino family. It has 14 digital input/output pins, 6 analog input pins, a 16 MHz quartz crystal, a USB connection, a power jack, and an ICSP header.
The digital input/output pins can be used to connect sensors, LEDs, motors, and other components that can be controlled using digital signals. The analog input pins can be used to read the values of analog sensors, such as temperature sensors, light sensors, and potentiometers.
The USB connection is used to program the board and to communicate with a computer. The power jack can be used to power the board using an external power supply, while the ICSP header can be used for in-circuit programming and debugging.
The Arduino Uno board is compatible with a wide range of sensors, shields, and modules, making it a versatile and flexible platform for building various electronic projects. The board can be programmed using the Arduino IDE, a free software development environment that supports a simplified version of the C++ programming language.
The Arduino Uno is a popular choice for hobbyists, students, and professionals who want to experiment with electronics and develop their own projects.
L293D Module
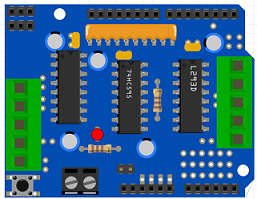
The L293D module shield is a motor driver board that can be used to control DC motors, stepper motors, and other motors using an Arduino or other microcontroller board. The board is based on the L293D motor driver IC, which can drive up to two DC motors or one stepper motor.
The L293D module shield has two H-bridge circuits, one for each DC motor, and can supply a voltage range of 4.5V to 36V DC, making it suitable for a wide range of motor applications. The board also has a built-in voltage regulator that can supply 5V or 3.3V to the connected microcontroller board.
The L293D module shield is easy to use and can be connected to the microcontroller board using just a few pins. The control pins can be connected to any available digital output pins of the microcontroller board, while the motor power supply can be connected to the board’s power input terminals.
The L293D module shield can be used for a variety of motor control applications, such as robotics, home automation, and industrial automation. The board is available in various form factors, including a breadboard-friendly version, making it easy to integrate into various projects.
Overall, the L293D module shield is a useful and cost-effective motor driver board that can be used to control different types of motors using an Arduino or other microcontroller board.
US-17HS4401 stepper motor
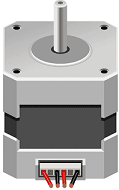
The US-17HS4401 is a type of bipolar stepper motor commonly used in robotics and other applications that require precise control of the motor’s position and speed. It has a step angle of 1.8 degrees per step, which means that it takes 200 steps to complete one full revolution.
The motor has four wires, which can be connected to a stepper motor driver board, such as the L293D module shield, to control its motion. The wiring sequence for the four wires is typically identified as A+, A-, B+, and B-, although the order may vary depending on the specific motor and driver.
The US-17HS4401 stepper motor is capable of providing high torque and accuracy, making it suitable for a wide range of applications, such as 3D printers, CNC machines, and other types of machinery. It requires a power supply with a voltage range of 9V to 42V and can draw up to 1.7A per phase, depending on the operating conditions.
To control the US-17HS4401 stepper motor using an Arduino or other microcontroller board, you would typically need a stepper motor driver board, such as the L293D module shield, and a suitable motor control library for your programming environment. You would also need to determine the appropriate wiring sequence for the motor and set the appropriate configuration parameters, such as the stepping mode and speed, to achieve the desired motion.
9V battery
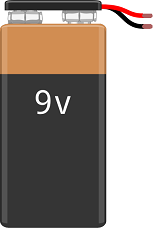
A 9V battery is a type of alkaline or carbon-zinc battery that provides 9 volts of electrical power. It is commonly used to power small electronic devices, such as remote controls, smoke detectors, and small portable radios.
Connecting wires

Connecting wires are electrical wires that are used to connect different components in an electronic circuit. They are typically made of copper or aluminum and come in various gauges, lengths, and colors.
Assembly
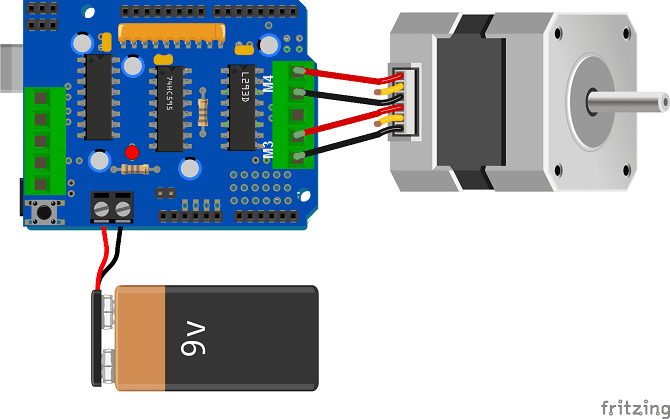
1- We connect the L293D module to the Arduino UNO board
2- Connect the pins of the US-17HS4401 stepper motor to both M3 and M4 ports of the L293D module
3- A 9V battery is used as a power source.
Arduino program
Here is the Arduino program that can control the 28BYJ-48 stepper motor by the Arduino UNO board and the L293D Shield module.
You have to import this library: AFMotor
|
1 2 3 4 5 6 7 8 9 10 11 12 13 14 15 16 17 18 19 20 21 22 23 24 25 26 27 28 29 30 31 32 |
#include <AFMotor.h> // Number of steps per output rotation // Change this as per your motor's specification const int stepsPerRevolution = 200; // connect motor to port #2 (M3 and M4) AF_Stepper motor(stepsPerRevolution, 2); void setup() { Serial.begin(9600); Serial.println("Stepper test!"); motor.setSpeed(150); // 10 rpm } void loop() { Serial.println("Single coil steps"); motor.step(50, FORWARD, SINGLE); /*motor.step(100, BACKWARD, SINGLE); Serial.println("Double coil steps"); motor.step(100, FORWARD, DOUBLE); motor.step(100, BACKWARD, DOUBLE); Serial.println("Interleave coil steps"); motor.step(100, FORWARD, INTERLEAVE); motor.step(100, BACKWARD, INTERLEAVE); Serial.println("Micrsostep steps"); motor.step(100, FORWARD, MICROSTEP); motor.step(100, BACKWARD, MICROSTEP); */ } |

