Control four motors by the Arduino and the Shield L293D module

Purpose of this tutorial
The L293D module is a motor driver that can be controlled by an Arduino. Here are the steps to control motors using an Arduino and L293D module:
- Connect the L293D module to the Arduino following the pinout diagram.
- Connect the power supply to the L293D module and to the motors.
- Define the input pins in the Arduino code that correspond to the L293D module‘s IN1, IN2, IN3, and IN4 pins.
- Set the output pins to the L293D module‘s input pins to control the direction and speed of the motors.
- Use the Arduino code to control the motors by adjusting the output pins.
Necessairy components
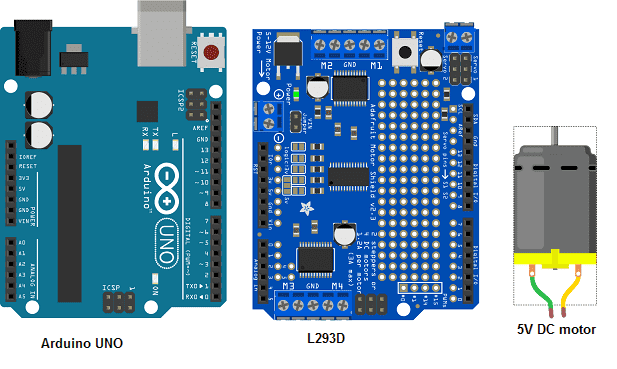
Arduino UNO

The Arduino UNO is a popular microcontroller board that is widely used for building electronics projects. It is based on the ATmega328P microcontroller and features a set of digital and analog input/output pins, as well as a USB interface for programming and communication with a computer.
The Arduino UNO is relatively easy to use and is supported by a large community of users and developers, with many resources available online for learning and troubleshooting. It can be programmed using the Arduino Integrated Development Environment (IDE), which uses a simplified version of the C++ programming language.
Some of the common applications of the Arduino UNO include robotics, home automation, data logging, and sensor monitoring. The versatility and flexibility of the Arduino platform make it a popular choice for both hobbyists and professionals.
L293D module
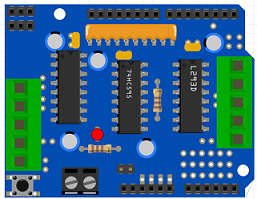
The L293D is a popular integrated circuit that is commonly used to control the direction and speed of DC motors. It includes built-in protection diodes and can handle high current loads, making it a popular choice for motor control applications. The term « shield » is often used to describe a circuit board or module that includes an L293D and other components, designed to be stacked on top of a microcontroller or other circuit board to simplify motor control.
The L293D shield can be connected to an Arduino Uno board to control the direction and speed of DC motors. The shield includes an L293D IC, which provides four H-bridge channels to control up to two DC motors. The shield can be plugged directly on top of the Arduino Uno board, simplifying the wiring and making it easy to control the motors using the Arduino programming language. The L293D shield is a popular choice for hobbyists and beginners who want to control DC motors with an Arduino Uno.
5V DC motor
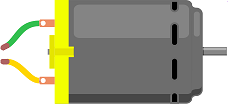
A 5V DC motor is a type of direct current motor that is designed to operate on a voltage of 5 volts DC. These motors are commonly used in low voltage applications, such as in hobby projects, toys, and small electronic devices. The speed and torque of a 5V DC motor can be controlled by varying the voltage or using a motor driver circuit. 5V DC motors come in various sizes and configurations, including brushed and brushless types, and can be found with different output shafts, gear ratios, and encoders.
5V DC motor can be controlled by L293D shield . The shield includes an L293D IC, which provides four H-bridge channels to control up to two DC motors. The L293D IC can handle a wide range of voltages, including 5V, making it a suitable choice for driving 5V DC motors. To control the speed and direction of a 5V DC motor using the L293D shield, you can connect the motor to one of the H-bridge channels on the shield and then use the appropriate Arduino programming commands to control the motor. The L293D shield is a popular choice for hobbyists and beginners who want to control 5V DC motors with an Arduino board.
9V battery
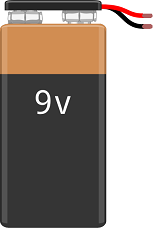
A 9V battery is an electrical power source that provides a nominal voltage of 9 volts. It is commonly used to power portable electronic devices such as radios, smoke detectors, calculators, and electronic musical instruments. It is typically made up of six dry cells of 1.5V connected in series inside a casing.
Assembly
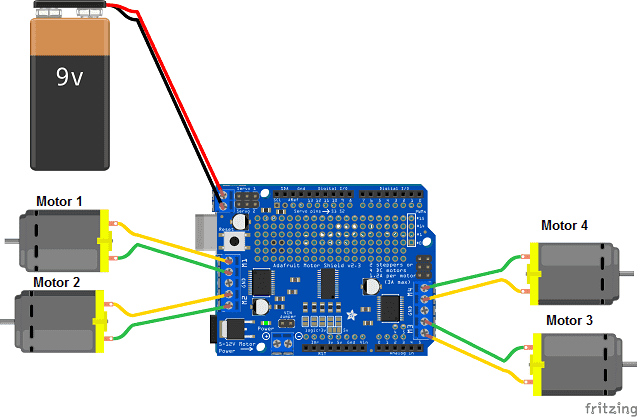
To control four 5V DC motors:
1- Connect the L293D module to the Arduino UNO board
2- Connect the first motor to port M1 of the L293D module
3- Connect the second motor to port M2 of the L293D module
4- We connect the third motor to the M3 port of the L293D module
6- We connect the fourth motor to the M4 port of the L293D module
Arduino program
Here is the Arduino program that allows four motors to be controlled by the Arduino board and the Shiel L293D module:
You have to import this library : AFMotor
|
1 2 3 4 5 6 7 8 9 10 11 12 13 14 15 16 17 18 19 20 21 22 23 24 25 26 27 28 29 30 31 32 33 34 35 36 37 38 39 40 41 42 43 44 45 46 47 48 |
#include <AFMotor.h> AF_DCMotor motor1(1); // connecter le moteur1 au port M1 du module Shield L293D AF_DCMotor motor2(2); // connecter le moteur2 au port M2 du module Shield L293D AF_DCMotor motor3(3); // connecter le moteur3 au port M3 du module Shield L293D AF_DCMotor motor4(4); // connecter le moteur4 au port M4 du module Shield L293D void setup() { motor1.setSpeed(100); motor2.setSpeed(100); motor3.setSpeed(100); motor4.setSpeed(100); } void loop() { motor1.run(FORWARD); // motor 1 is running delay(1000); motor1.run(RELEASE); // motor 1 is stopped delay(500); motor2.run(FORWARD); // motor 2 is running delay(1000); motor2.run(RELEASE); // motor 2 is stopped delay(500); motor3.run(FORWARD); // motor 3 is running delay(1000); motor3.run(RELEASE); // motor 3 is stopped delay(500); motor4.run(FORWARD); // motor 4 is running delay(1000); motor4.run(RELEASE); // motor 4 is stopped delay(500); motor1.run(BACKWARD); // motor 1 rotates in the opposite direction delay(1000); motor1.run(RELEASE); // motor 1 is stopped delay(500); motor2.run(BACKWARD);// motor 2 rotates in the opposite direction delay(1000); motor2.run(RELEASE); // motor 2 is stopped delay(500); motor3.run(BACKWARD); // motor 3 rotates in the opposite direction delay(1000); motor3.run(RELEASE); // motor 3 is stopped delay(500); motor4.run(BACKWARD);// motor 4 rotates in the opposite direction delay(1000); motor4.run(RELEASE); // motor 4 is stopped delay(500); } |

