IoT applied in Agriculture with Arduino

IoT technology in Agriculture
IoT (Internet of Things) technology can be used in agriculture to improve crop yields, reduce costs, and increase efficiency. IoT devices, such as sensors, cameras, and drones, can be used to gather data about crop growth, soil conditions, and weather patterns, which can then be analyzed and used to make more informed decisions about planting, irrigation, and fertilization.
Some examples of how IoT can be used in agriculture include:
- Precision Agriculture: IoT-enabled sensors can be used to gather data on soil moisture, temperature, and pH levels, which can be used to optimize irrigation and fertilization. This can help to reduce water and chemical usage, and increase crop yields.
- Crop Monitoring: IoT cameras and drones can be used to monitor crop growth, detect pests and diseases, and identify areas that need attention. This can help farmers to take action more quickly and make more informed decisions about crop management.
- Livestock Monitoring: IoT sensors can be used to monitor the health and well-being of livestock, including temperature, heart rate, and movement. This can help farmers to detect potential health issues early and take action to prevent them.
- Weather Monitoring: IoT sensors can be used to gather data on weather patterns, such as temperature, precipitation, and wind speed, which can be used to predict future weather conditions and make more informed decisions about planting and harvesting.
- Automation: IoT technology can be used to automate tasks such as irrigation and fertilization, which can help to reduce labor costs and increase efficiency.
Overall, IoT technology in agriculture can help farmers to increase crop yields, reduce costs, and increase efficiency. By gathering data on soil, weather and crop conditions, it can help farmers to make more informed decisions and take more precise
Arduino-based IoT (Internet of Things)
An Arduino-based IoT (Internet of Things) system can be used in agriculture to improve crop yields, reduce costs, and increase efficiency by gathering and analyzing data about crop growth, soil conditions, and weather patterns. Arduino is a microcontroller board that can be programmed to collect data from various sensors, and can be integrated with other IoT devices such as WiFi or cellular modules to transmit the data to a remote server for analysis.
Some examples of how an Arduino-based IoT system can be used in agriculture include:
- Precision Agriculture: IoT-enabled sensors such as soil moisture, temperature, and pH sensors can be connected to an Arduino board to gather data on soil conditions. The Arduino can then be programmed to analyze the data and make decisions about irrigation and fertilization, which can help to reduce water and chemical usage, and increase crop yields.
- Crop Monitoring: IoT cameras and drones can be connected to an Arduino board to monitor crop growth and detect pests and diseases. The Arduino can then be programmed to analyze the data and make decisions about crop management, such as when to spray pesticides or fertilize.
- Livestock Monitoring: IoT sensors can be connected to an Arduino board to monitor the health and well-being of livestock, such as temperature, heart rate, and movement. The Arduino can then be programmed to analyze the data and make decisions about the care of the livestock.
- Weather Monitoring: IoT sensors such as temperature, precipitation, and wind speed sensors can be connected to an Arduino board to gather data on weather patterns. The Arduino can then be programmed to analyze the data and make predictions about future weather conditions, which can be used to make more informed decisions about planting and harvesting.
- Automation: An Arduino-based IoT system can be used to automate tasks such as irrigation and fertilization by connecting the system to actuators such as valves and pumps.
In summary, an Arduino-based IoT system can be used in agriculture to improve crop yields, reduce costs, and increase efficiency by gathering and analyzing data about crop growth, soil conditions, and weather patterns, and making decisions based on the data. The system can also be used to automate tasks such as irrigation and fertilization and monitor the health and well-being of livestock.
Presentation of ThingSpeak
ThingSpeak is a cloud-based Internet of Things (IoT) platform that allows users to collect, store, and analyze sensor data from IoT devices. It provides a set of APIs (Application Programming Interfaces) and tools that enable users to easily connect their IoT devices to the cloud, and to visualize and analyze the data that is collected.
ThingSpeak provides several features that make it well-suited for IoT applications:
- Data storage: ThingSpeak provides a cloud-based data storage service that allows users to store and retrieve sensor data from IoT devices.
- Data visualization: ThingSpeak provides a web-based interface for visualizing sensor data, which allows users to easily view and analyze the data that is collected.
- Data analysis: ThingSpeak provides a set of tools for analyzing sensor data, such as MATLAB, which allows users to perform advanced data analysis.
- Real-time data streaming: ThingSpeak allows users to stream sensor data in real-time, which enables users to monitor and respond to changes in sensor data as they occur.
- Actuation: ThingSpeak also allows users to perform actuation, which means to control other devices based on the sensor data received.
ThingSpeak is often used in a wide range of IoT applications, such as smart homes, industrial monitoring, and environmental monitoring. It is also popular among educators and students, as it provides an easy-to-use platform for learning about IoT and programming.
ThingSpeak can be used in conjunction with an Arduino microcontroller to collect, store, and analyze sensor data from IoT devices. ThingSpeak provides a set of APIs (Application Programming Interfaces) and tools that enable users to easily connect their Arduino-based IoT devices to the cloud, and to visualize and analyze the data that is collected.
To use ThingSpeak with an Arduino, you would need to:
- Create an account on ThingSpeak and create a new channel to store your data
- Connect your Arduino board to a sensor or other data-gathering device
- Write code on your Arduino board using the Arduino IDE to read the data from the sensor and send it to ThingSpeak using the ThingSpeak API.
- Use ThingSpeak‘s web interface or MATLAB analytics tool to visualize and analyze the data.
ThingSpeak allows for real-time data streaming and visualization, which makes it easy to monitor and respond to changes in sensor data as they occur. It also allows you to perform actuation, which means to control other devices based on the sensor data received.
ThingSpeak is often used in a wide range of IoT applications, such as smart homes, industrial monitoring, and environmental monitoring. It is also popular among educators and students, as it provides an easy-to-use platform for learning about IoT and programming.
Purpose of this project:
This project describes the application of IoT (Internet of Things) in agriculture. In this environment we take measurements of the humidity of the soil of a plant.
Monitoring of the parameter around this process (information provided by the soil sensor) is done using open source tools and resources such as Arduino and ThingSpeak.
We read the soil moisture sensor data in real time on the internet through a web page and also on the graphs in ThingSpeak.
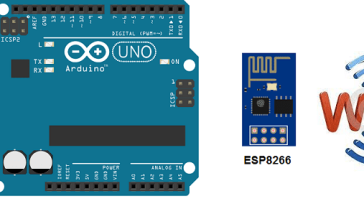
This work is done using a microcontroller (Arduino) connected to an ESP8266 module which will send all information via WIFI concerning the environment of our plant, to ThingSpeak.
Necessary components
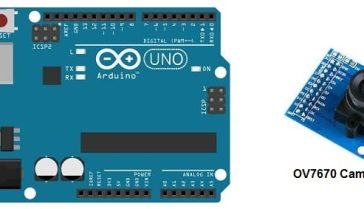
Arduino UNO

The Arduino UNO is a microcontroller board based on the ATmega328P. It has 14 digital input/output pins, 6 analog inputs, a 16 MHz quartz crystal, a USB connection, a power jack, an ICSP header, and a reset button. The Arduino UNO is programmed using the Arduino software (IDE), which is available for Windows, Mac, and Linux. The board can be powered by an external power supply or by USB. It is compatible with a wide range of sensors, actuators, and other devices, which can be connected to it using a variety of communication protocols, such as I2C, SPI, and UART. The Arduino UNO is a popular choice for beginners and hobbyists, as it is easy to use and has a large community of users and developers
Soil moisture sensor
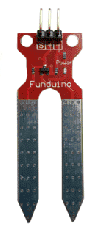
A soil moisture sensor is a device that measures the water content in soil. It can be used in agriculture, gardening, and landscaping to monitor soil moisture levels and determine when to water plants or crops.
There are different types of soil moisture sensors, but most work by measuring the electrical resistance or capacitance of the soil. When the soil is dry, the electrical resistance is high, and when the soil is wet, the resistance is low. Some soil moisture sensors also measure the dielectric constant of the soil, which changes with the water content.
Soil moisture sensors typically have two electrodes that are inserted into the soil. The electrodes measure the electrical resistance or capacitance of the soil and send a signal to a microcontroller or other electronic device. The microcontroller can then interpret the signal and determine the moisture level of the soil.
Soil moisture sensors can be used in agriculture to optimize irrigation and fertilization, reducing water and chemical usage, and increasing crop yields. They can also be used in gardening and landscaping to determine when to water plants.
They can be connected to an arduino or microcontroller board and integrated with IoT technology to transmit the data to a remote server for monitoring and analysis, and can also be integrated with actuators such as valves and pumps to automate irrigation.
In summary, a soil moisture sensor is a device that measures the water content in soil. It can be used in agriculture, gardening, and landscaping to monitor soil moisture levels and determine when to water plants or crops, and can be integrated with IoT technology to transmit the data to a remote server for monitoring and analysis.
ESP8266 wifi

ESP8266 is a low-cost Wi-Fi microcontroller chip with full TCP/IP stack and microcontroller capability. It is produced by Espressif Systems, a Chinese manufacturer. It can be used to add Wi-Fi connectivity to devices such as microcontrollers, and it is often used in Internet of Things (IoT) projects.
The ESP8266 chip includes a 32-bit processor, flash memory, and a built-in Wi-Fi module, making it a complete solution for adding Wi-Fi connectivity to a device. It can be easily integrated with a microcontroller, such as an Arduino or a Micro:bit, and can be programmed using a variety of programming languages, such as C, C++, and Python.
The ESP8266 can be used in a variety of projects, such as wireless sensor networks, home automation systems, and web-connected devices. It can be programmed to connect to a Wi-Fi network, send and receive data, and interact with other devices over the Internet. The chip has a very small form factor and low power consumption, making it ideal for battery-powered devices.
In summary, the ESP8266 is a popular, low-cost, and versatile Wi-Fi module that can be used to add wireless connectivity to a variety of devices and projects. It offers a complete solution for IoT projects, and its small form factor and low power consumption make it ideal for battery-powered applications.
Connecting wires

Connecting wires refer to the process of connecting two or more electrical wires together in order to transmit electrical signals or power from one device to another. This can be done using a variety of methods and techniques, depending on the type of wire and the application.
Test plate
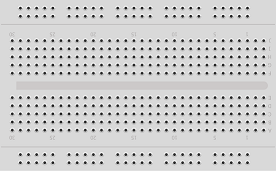
A test plate is used to include the flame sensor module, as well as connectors and other components to interface the sensor with the Micro:bit. It may also include LEDs, buttons or other input/output devices to test the functionality of the sensor and the microcontroller. The test plate allows for easy testing and validation of the sensor and the Makecode that is used to interact with it.
Mounting :
To perform the assembly, you can connect:
for the soil sensor:
-
pin S to pin A0 of the Arduino board
-
the pin (+) to the 3.3V pin of the Arduino board
-
the pin (-) to the GND pin of the Arduino board
For ESP8266 module:
-
The RX pin to pin 4 of the Arduino board
-
The TX pin to pin 3 of the Arduino board
-
The GND pin to the GND of the Arduino board
-
The two pins 3V3 and EN to the 5V pin of the power supply module
-
The RST pin to pin 8 of the Arduino board

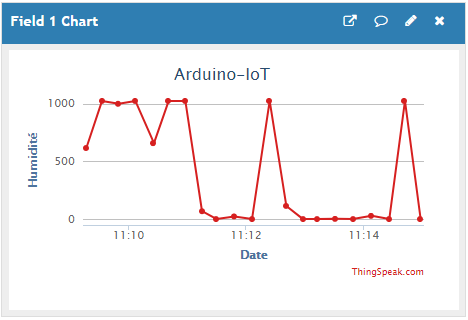
The soil moisture values sent by the Arduino board to the thinkspeak.com site
Program:
|
1 2 3 4 5 6 7 8 9 10 11 12 13 14 15 16 17 18 19 20 21 22 23 24 25 26 27 28 29 30 31 32 33 34 35 36 37 38 39 40 41 42 43 44 45 46 47 48 49 50 51 52 53 54 55 56 57 58 59 60 61 62 63 64 65 66 67 68 69 70 71 72 73 74 75 76 77 78 79 80 81 82 83 84 85 86 87 88 89 90 91 92 93 94 95 96 97 98 99 100 101 102 103 104 105 106 107 108 109 110 111 112 113 114 115 116 117 118 119 |
#include <Adafruit_ESP8266.h> #include <SoftwareSerial.h> #define ESP_RX 3 #define ESP_TX 4 #define ESP_RST 8 SoftwareSerial softser(ESP_RX, ESP_TX); // Must declare output stream before Adafruit_ESP8266 constructor; can be // a SoftwareSerial stream, or Serial/Serial1/etc. for UART. Adafruit_ESP8266 wifi(&softser, &Serial, ESP_RST); // Must call begin() on the stream(s) before using Adafruit_ESP8266 object. #define ESP_SSID "**************" // Your network name here #define ESP_PASS "*************" // Your network password here String API = "*******************"; // CHANGE ME #define HOST "api.thingspeak.com" // Find/Google your email provider's SMTP outgoing server name for unencrypted email #define PORT 80 // Find/Google your email provider's SMTP outgoing port for unencrypted email String field = "field1"; int count = 0; // we'll use this int to keep track of which command we need to send next bool send_flag = false; // we'll use this flag to know when to send the email commands #define SOLPIN 5 // // pour le capteur de l’humidité du sol int analogVal; void setup() { char buffer[50]; // This might work with other firmware versions (no guarantees) // by providing a string to ID the tail end of the boot message: // comment/replace this if you are using something other than v 0.9.2.4! wifi.setBootMarker(F("Version:0.9.2.4]\r\n\r\nready")); softser.begin(9600); // Soft serial connection to ESP8266 Serial.begin(57600); while(!Serial); // UART serial debug // Test if module is ready Serial.print(F("Hard reset...")); if(!wifi.hardReset()) { Serial.println(F("no response from module.")); for(;;); } Serial.println(F("OK.")); Serial.print(F("Soft reset...")); if(!wifi.softReset()) { Serial.println(F("no response from module.")); for(;;); } Serial.println(F("OK.")); Serial.print(F("Checking firmware version...")); wifi.println(F("AT+GMR")); if(wifi.readLine(buffer, sizeof(buffer))) { Serial.println(buffer); wifi.find(); // Discard the 'OK' that follows } else { Serial.println(F("error")); } Serial.print(F("Connecting to WiFi...")); if(wifi.connectToAP(F(ESP_SSID), F(ESP_PASS))) { // IP addr check isn't part of library yet, but // we can manually request and place in a string. Serial.print(F("OK\nChecking IP addr...")); wifi.println(F("AT+CIFSR")); if(wifi.readLine(buffer, sizeof(buffer))) { Serial.println(buffer); wifi.find(); // Discard the 'OK' that follows Serial.print(F("Connecting to host...")); Serial.print("Connected.."); wifi.println("AT+CIPMUX=0"); // configure for single connection, //we should only be connected to one SMTP server wifi.find(); wifi.closeTCP(); // close any open TCP connections wifi.find(); Serial.println("Type \"send it\" to send an email"); } else { // IP addr check failed Serial.println(F("error")); } } else { // WiFi connection failed Serial.println(F("FAIL")); } } void loop() { send_flag = true; if(send_flag){ // the send_flat is set, this means we are or need to start sending SMTP commands if(do_next()){ // execute the next command count++; // increment the count so that the next command will be executed next time. } } } boolean do_next() { switch(count){ case 0: Serial.println("Connecting..."); return wifi.connectTCP(F(HOST), PORT); break; case 1: analogVal = analogRead(SOLPIN); // soil moisture reading char charVal2[100]; char charVal1[100]="GET /update?api_key=KM7MYIGX8G2X6GA0&field1="; itoa(analogVal, charVal2, 10); //dtostrf(analogVal, 4, 2, charVal2); strcat(charVal1,charVal2); return wifi.cipSend(charVal1); // Sending data to the Thinkspeak site delay(60000); } } |

