
An Arduino microcontroller can be used in combination with a Bluetooth module to send data to a computer wirelessly. The Arduino can be programmed to collect data from sensors or other devices and then transmit the data to the computer via Bluetooth. The computer can then receive the data and process it using software.
To accomplish this, the Arduino board needs to be connected to a Bluetooth module, such as HC-05 or HC-06. These modules are low-cost and easy to interface with the Arduino. The Arduino can then be programmed to send data to the Bluetooth module which will then transmit the data to the computer.
On the computer side, a software program can be used to receive the data from the Bluetooth module. The program can be written in a variety of languages such as Python, Java or C#. The program can be used to display the data, store it in a file, or send it to another device over the internet.
It’s a common way to create wireless communication between an Arduino and a computer, it’s simple to set up and it doesn’t require a specific operating system. The computer can be running Windows, MacOS or Linux and it can be connected to the Arduino via Bluetooth without any additional hardware.
Objective of this project:
An Arduino microcontroller can be used in combination with a Bluetooth module and a lamp to control the lamp wirelessly from a computer. The Arduino can be programmed to receive commands from the computer via Bluetooth, and then control the lamp accordingly.
To accomplish this, the Arduino board needs to be connected to a Bluetooth module, such as HC-05 or HC-06, and to a lamp control circuit. The lamp control circuit can be a simple circuit with a transistor to switch on and off the lamp or a more complex circuit with a dimmer to control the brightness of the lamp.
The Arduino can then be programmed to receive commands from the Bluetooth module and control the lamp accordingly. The computer can then be programmed to send commands to the Bluetooth module which will then transmit the commands to the Arduino.
On the computer side, a software program can be used to send the commands to the Bluetooth module. The program can be written in a variety of languages such as Python. The program can be used to display a user interface to turn on/off the lamp or to adjust the brightness.
It’s a simple and low-cost way to create a wireless control system for a lamp. The system can be easily expanded to include more lamps or to control other devices.
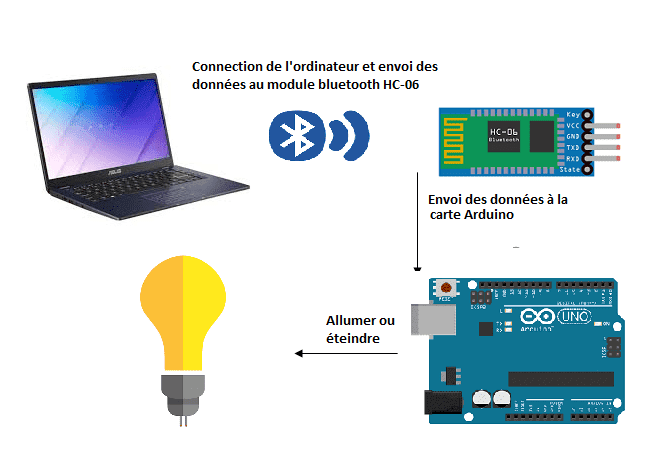
In this project we will create a system allowing to turn on and off a lamp (by bluetooth) using the Arduino board and a computer.
This is why we are going to create two programs: one for the computer and the other for the Arduino board.
Components required
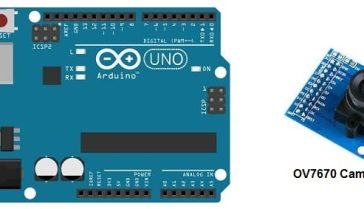
Arduino UNO

The Arduino UNO is a microcontroller board based on the ATmega328P microcontroller. It is one of the most popular boards in the Arduino family and is widely used for a variety of projects, from hobbyist and educational projects to professional applications.
The Arduino UNO has a variety of features that make it easy to use, including:
- A microcontroller: The ATmega328P microcontroller is a powerful and versatile chip that can be programmed using the Arduino programming language.
- Input/Output (I/O) pins: The board has 14 digital I/O pins and 6 analog input pins, which can be used to interface with a wide variety of sensors, actuators, and other devices.
- Power supply: The board can be powered by an external power supply or by USB. It has a voltage regulator that can accept a wide range of input voltage and provide a stable 5V output.
- Programming interface: The board has a USB-to-Serial converter that can be used to program the microcontroller and communicate with the computer.
- On-board LEDs and buttons: The board has two LEDs (RX and TX) and one reset button that can be used for debugging or testing purposes.
- Compatibility: The Arduino UNO is compatible with a wide range of shields and add-on boards, which can be used to add additional functionality to the board.
The Arduino UNO is an open-source platform and it’s easy to find tutorials, sample codes, and libraries. It’s a good choice for beginners and also for more advanced projects, it’s widely supported by the community and it’s easy to find
Relay
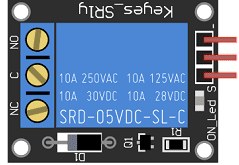
A relay is an electronic switch that can be used to control a lamp with an Arduino microcontroller. The relay is an electromechanical device that uses an electromagnet to open or close a switch, allowing electricity to flow to the lamp.
To control a lamp with an Arduino and a relay, the relay needs to be connected to the Arduino and the lamp. The connection between the Arduino and the relay can be done through the use of a relay module. There are different types of relay modules available in the market, such as single relay module or multiple relay module, depending on the application needs.
The relay module has several pinout, the most common is to have the VCC, GND and IN pins, where the VCC and GND are used to provide power to the relay and the IN pin is used to trigger the relay. To trigger the relay, the Arduino can send a digital signal to the IN pin. The relay will then switch the lamp on or off depending on the state of the signal.
Lamp

A lamp that operates at 220V would likely be a traditional AC (alternating current) lamp, such as an incandescent or fluorescent lamp. These types of lamps typically have a higher voltage rating compared to DC (direct current) lamps, and they are typically connected directly to the mains power supply.
When using an Arduino to control a 220V lamp, it is important to note that the Arduino itself is not designed to handle such high voltage and current, it can be dangerous to both the Arduino and the user. To control a 220V lamp, a relay or a solid-state relay (SSR) can be used to switch on and off the power supply. The relay or SSR is connected to the Arduino, and it controls the flow of electricity to the lamp.
It’s important to note that working with high voltage can be extremely dangerous and it should only be attempted by someone with appropriate knowledge and experience. It’s also important to use appropriate safety measures, such as a circuit breaker, an isolation transformer, and appropriate wiring techniques.
It’s recommended to consult a professional electrician or an expert in high voltage systems if you’re planning on working with 220V lamps. They can advise you on the appropriate safety measures, and how to properly install and maintain the system.
Connecting wires

Wires are used to transmit electrical signals and power to various components such as motors, sensors, and microcontrollers. It’s important to properly route and secure the wires to prevent tangles and damage. There are several methods for doing this, including using cable ties, clamps, and wire looms. It’s also a good idea to use different colors or labeling to identify the different wires and their functions. When connecting wires in a robot, it’s important to follow proper safety procedures, such as using the correct wire stripper and connectors, and wearing protective equipment such as gloves and safety glasses.
Test plate
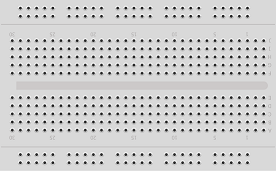
An electronic test plate is a type of laboratory equipment that is used to hold and organize electronic components or printed circuit boards (PCBs) during testing or analysis. It is similar to a traditional test plate, but it is designed specifically for electronic components.
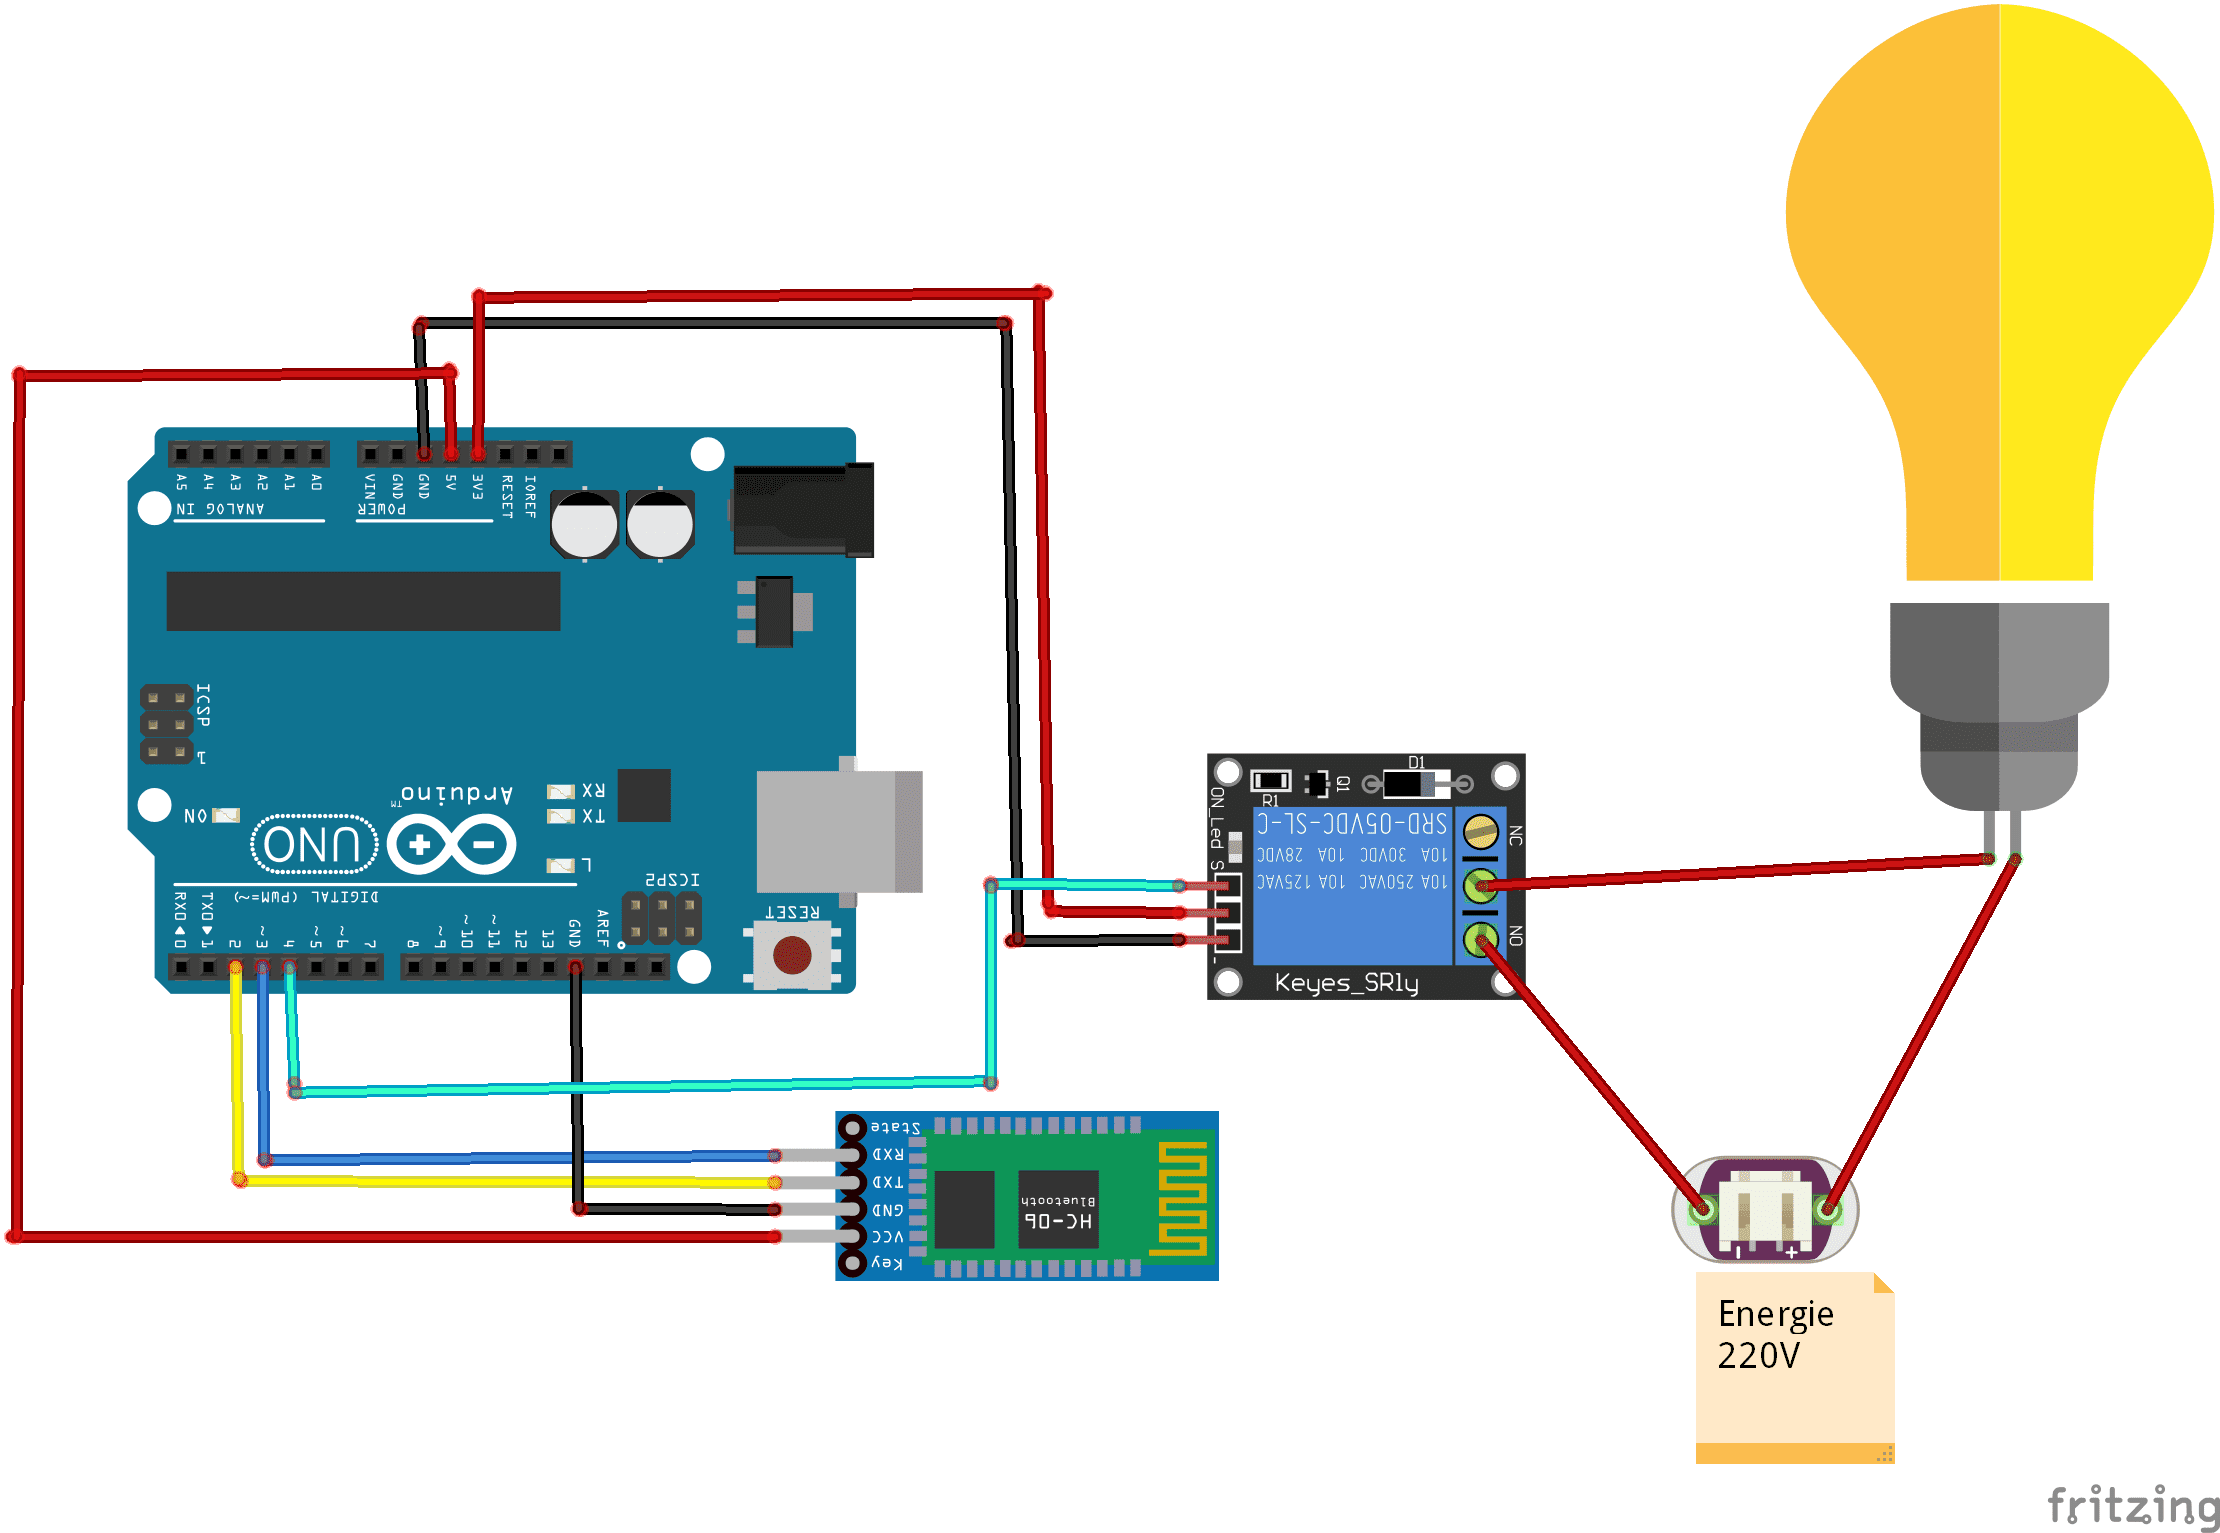
Assembly:
Communication between computer, HC-06 and Arduino:
Arduino Program
Here is the program which allows you to connect the Arduino board to the HC-06 bluetooth module and to receive a message containing the order to turn the lamp on or off.
|
1 2 3 4 5 6 7 8 9 10 11 12 13 14 15 16 17 18 19 20 21 22 23 24 25 26 27 28 29 30 31 32 33 34 35 |
#include <SoftwareSerial.h> SoftwareSerial hc06(2,3); String cmd=""; void setup(){ pinMode(4,OUTPUT); //règle la borne numérique numéro 4 de la carte Arduino en mode sortie digitalWrite(4,LOW);//Eteindre la lampe //Initialize Serial Monitor Serial.begin(9600); //Initialize Bluetooth Serial Port hc06.begin(9600); } void loop(){ //Read data from HC06 while(hc06.available()>0){ cmd+=(char)hc06.read(); } //Select function with cmd if(cmd!=""){ Serial.print("Command recieved : "); Serial.println(cmd); // We expect ON or OFF from bluetooth if(cmd.indexOf("eteindre")!=-1){ digitalWrite(4,LOW);//Turn off the lamp Serial.println("Function is on"); }else if(cmd.indexOf("allumer")!=-1){ digitalWrite(4,HIGH);//Turn on the lamp Serial.println("Function is off"); } cmd=""; //reset cmd } delay(100); } |
Python program executed in the computer:
Here is the program which allows the computer to connect and send data to the HC-06 bluetooth module.
|
1 2 3 4 5 6 7 8 9 10 11 12 13 14 15 16 17 18 19 20 21 22 23 24 25 26 27 |
import serial import time from pynput import keyboard evenement="" print("Start") port="COM20" #This will be different for various devices and on windows it will probably be a COM port. bluetooth=serial.Serial(port, 9600)#Start communications with the bluetooth unit print("Connected") bluetooth.flushInput() #This gives the bluetooth a little kick result = str(0)+'\n' def on_key_pressed(key): global result print('pressed %s' % key) result1 ='%s' % key if result1=='<97>' : # if you press 1 on the keyboard result = 'allumer'+'\n' print(result) if result1=='<96>' : # if you press 0 on the keyboard result = 'eteindre'+'\n' print(result) result_bytes = result.encode('utf_8') bluetooth.write(result_bytes) with keyboard.Listener(on_press=on_key_pressed) as listener: listener.join() |

