NeoPixels, also known as WS2812B LEDs, can be used in conjunction with a Microbit microcontroller to create colorful and customizable lighting effects. The Microbit can control the NeoPixels via its digital output pins, using the NeoPixel library for the Microbit, which can be found on the Microbit website.
To use NeoPixels with the Microbit, you will first need to connect the NeoPixels to the Microbit‘s digital output pin. This can be done by connecting the data input pin of the first NeoPixel to the Microbit’s digital output pin and connecting the data output pin of the last NeoPixel to the data input pin of the first one creating a chain of NeoPixels.
Once the NeoPixels are connected, you can use the NeoPixel library to control the color and brightness of each individual NeoPixel. The library provides various functions such as setting the color, brightness, and animation of the NeoPixels. With the library and the Microbit‘s capabilities, you can create a wide range of lighting effects, such as fading, scrolling text, and even creating custom animations.
It’s important to note that NeoPixels require a high amount of current to operate, therefore, you should use a separate power supply for the NeoPixels, and also, you should use a level shifter or a voltage divider circuit to avoid damaging the Microbit. Additionally, you’ll need to install the library from the Microbit website and use the Microbit‘s editor to program and upload the code to the Microbit.
Purpose of this tutorial:
In this tutorial we will light Neopixel with 8 LEDs by the micro:bit card.
Necessary components
Micro:bit
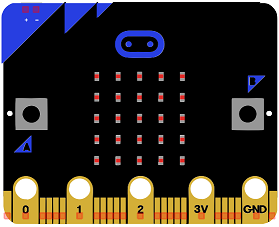
Micro:bit is a small, low-cost microcontroller board designed for educational use. It was developed by the BBC in partnership with a number of technology companies, with the goal of promoting computer science education in schools. The board is equipped with a 32-bit ARM Cortex-M0 CPU, and features a range of sensors and interfaces, including an accelerometer, a compass, a thermometer, a 5×5 LED matrix, and two programmable buttons.
The Micro:bit can be programmed using a variety of programming languages, including Microsoft MakeCode, a block-based programming language, and MicroPython, a Python implementation for microcontrollers. Programs can be written and uploaded to the Micro:bit using a USB connection or wirelessly using a smartphone or tablet.
The Micro:bit is a versatile and easy-to-use microcontroller board that can be used for a wide range of educational and hobby projects, such as creating interactive games and animations, controlling motors and servos, and even building robots. It has a lot of online tutorials, projects, and resources that make it suitable for beginners and educators.
GPIO Expansion Card
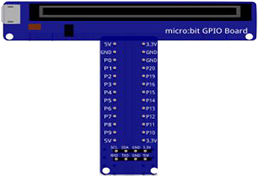
A GPIO (General Purpose Input/Output) expansion card for Microbit is a type of expansion card that adds additional GPIO pins to the Microbit microcontroller. These additional pins allow the Microbit to interface with external devices such as sensors, actuators, and other electronics.
The GPIO expansion card for Microbit typically connects to the Microbit via the edge connector or the header pins. Once connected, the additional pins on the expansion card can be accessed and controlled through software, just like the original pins on the Microbit.
Neopixels of 8 LEDs
![]()
NeoPixels, also known as WS2812B LEDs, are individually addressable RGB LEDs that can be controlled to create various lighting effects. Each NeoPixel consists of a red, green, and blue LED, and a tiny microcontroller that controls the brightness and color of the LED. A string of 8 NeoPixels can be controlled using a microcontroller, such as an ESP32, to create a variety of lighting effects.
Test plate
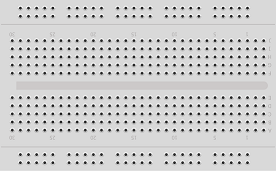
A test plate for Arduino is a type of test plate that can be used in conjunction with an Arduino microcontroller to automate experiments or tests. The test plate typically contains multiple wells or compartments that can hold samples or test solutions, and is designed to interface with the Arduino’s digital inputs and outputs.
Connecting wires

Wires in a robotic system are used to connect and transmit electrical signals between different components of the robot. These components can include sensors, actuators, motors, and the microcontroller, such as an Arduino. The wires in a robotic system are typically made of copper and are insulated to prevent electrical interference and short circuits.
The type of wires used in a robotic system depends on the specific application and requirements of the robot. For example, a robot that requires high-current power transmission may use thicker, high-gauge wires, while a robot that requires a high degree of flexibility and movement may use thinner, more flexible wires.
Wires in a robotic system can be used to transmit power, control signals, and data between the different components of the robot. They can also be used to connect the robot to external devices, such as a computer or a power source. The proper use of wires is crucial for the robot to function properly, and a bad wiring can cause malfunction, safety hazards, and even damage to the equipment.
It is important to use the right type of wire for the right application, and it is also important to keep the wires organized and secure to prevent them from getting tangled, damaged, or disconnected.
Assembly
To carry out the assembly, you can connect:
-
Neopixels GND pin to Micro:bit GND pin
-
the 5V pin of the Neopixels to the 3.3V pin of the Micro:bit
-
Neopixels DI pin to Micro:bit P0 pin
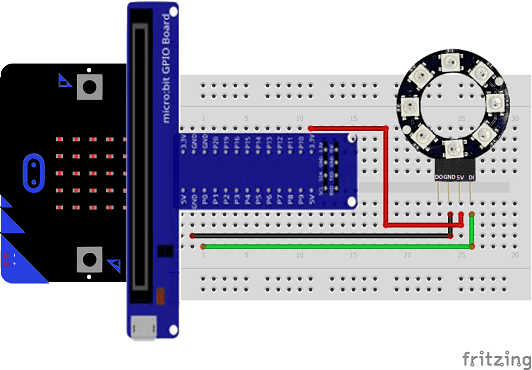
Makecode program
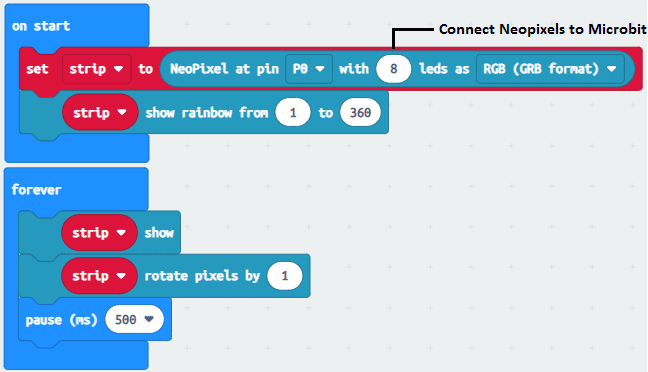
Here is the makecode program that allows you to turn on Neopixels by the Micro:bit card.
